MOTI Soccer Tip: Drill Controls – Part 2 of 3
Welcome back to the 3-part series on MOTI Soccer drill controls. In this
article the Zoom Controls and Camera View Menu
will be reviewed and explained. Utilizing these features, reviewing the
play from a multitude of angles and levels of detail is possible.
To recap, the review of the drill controls are divided into 3 parts. Topics
for the 3 parts are:
- Animation Controls and Overview – Part 1 introduced the main
control panel, the animation controls and the menu/control-panel buttons. - Zoom Controls and Camera Views Menu (this article) – Part 2
covers both the zoom controls and the camera view menu that help with
viewing the drill in different ways. - Drill Effects – Part 3 will cover the drill effects that are
available to help visualize the workings of the drill.
Review
The first article introduced layout of the drill controls in the panel and
described the functionality of each of the buttons and controls. The
content of the previous article will be used as a basis of this article.
Read the first article if these concepts are unfamiliar or a refresher is
needed.
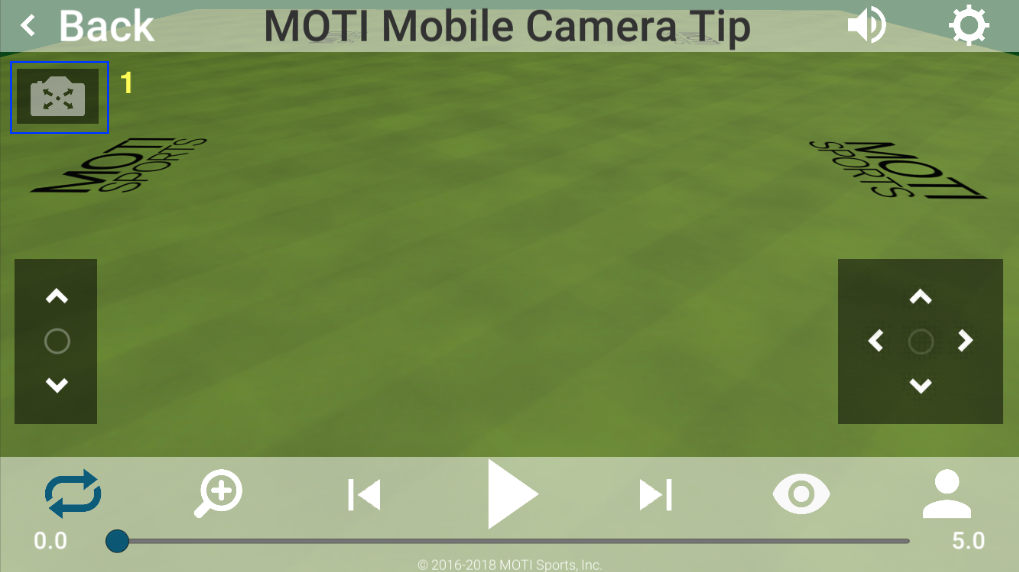
Controls Overview
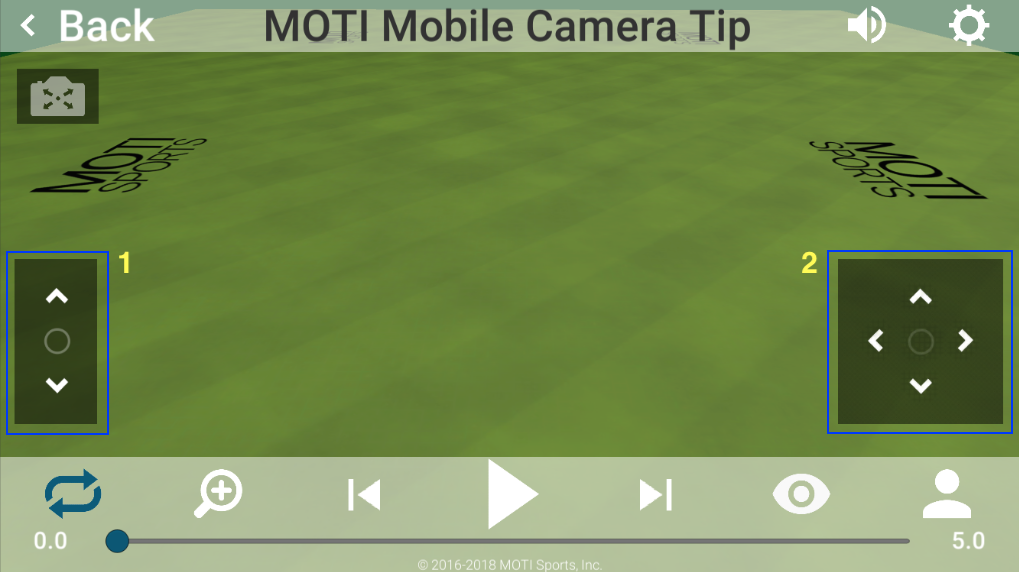
As described in the first article, the drill controls are located at the
bottom of the screen and are always on-screen. The follow sections will
refer to the image below using both the icon and the numbers for
identification.

Zoom Controls

Pressing zoom controls button (number 1, in the Controls Overview section) will activate a pop-up control
that can change the zoom of the camera. This allows the user to zoom in or
out while not moving the camera. To deactivate the pop-up control, press
the zoom controls button again or press any other button.

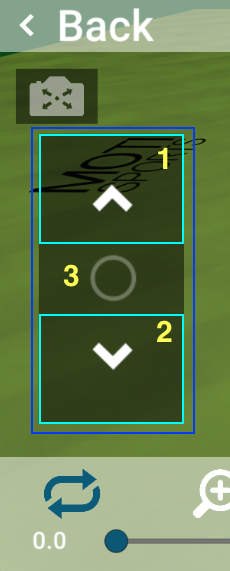
The zoom control set (numbers 1, 2 and 3, directly above) shows the current
zoom level, the available range of the zoom and allows the user to finely
control the zoom of the camera. The parts of the zoom control set are:
Decrease zoom button “-” (number 1)
Each press of this button will decrease the zoom level 1/10th of
the total zoom range. This has the visual effect of zooming out and seeing
more of the field, but less detail. Once the zoom range reaches the
left-most position in the range, pressing this button will have no effect.
Position slider control (number 2)
This slider represents the total range available for the zoom. The position
of the round button represents the current zoom level that is being
displayed. Pressing and dragging the round button left or right will change
the zoom level. Drag left to zoom out. Drag right to zoom in.
Increase zoom button “+” (number 3)
Each press of this button will increase the zoom level 1/10th of
the total zoom range. This has the visual effect of zooming in and seeing
less of the field, but more detail. Once the zoom range reaches the
right-most position in the range, pressing this button will have no effect.
Utilizing the zoom is a convenient way to view detail or view a larger
amount of the field without moving the camera. However, it is important to
note that the effect of the extremes of the zoom can make changing the view
or moving or around the field (by the on-screen joysticks or mouse)
visually confusing. When zoomed all the way in, the camera will appear to
move/pan very quickly. Additionally, when zoomed all the way out, the
camera will appear to move/pan very slowly, but have a fish-eye effect. In
both instances, the camera is moving/panning at the same speed. Keeping the
zoom level in the mid-range while moving/panning produces the most visually
appealing effect.
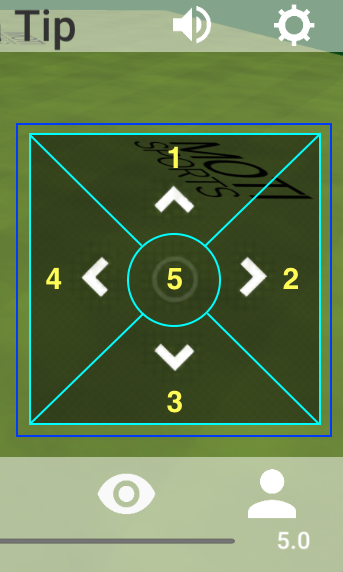
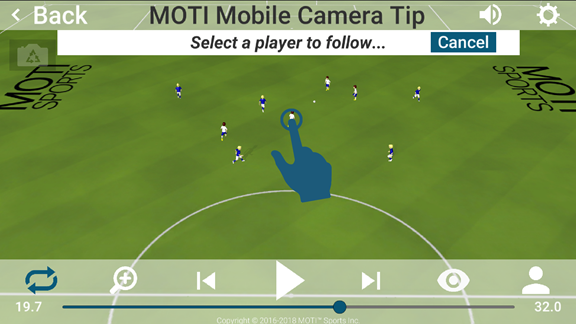
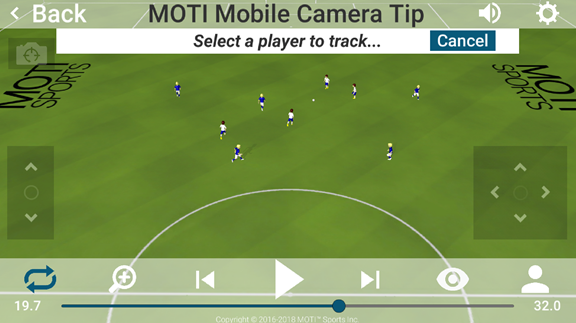
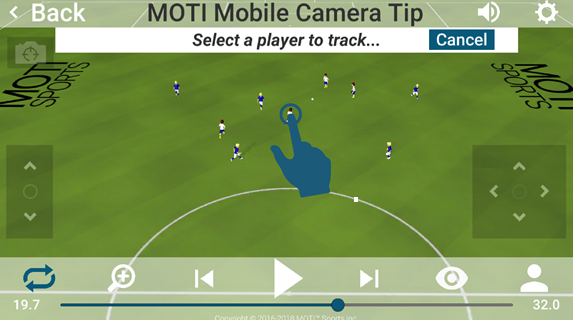
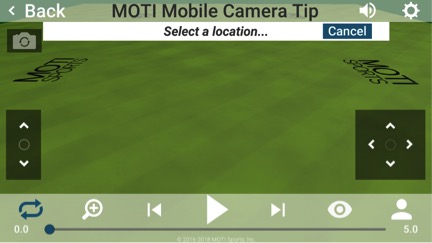
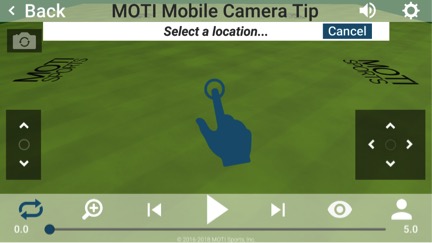
Camera Views Menu

Pressing the camera views button (number 2, in the Controls Overview section) will display a pop-up menu that
contains a list of camera views that are available. Selecting an item from
this menu will move the camera to the location and the view described by
the menu item. Pressing and sliding a finger up and down in the menu area
will reveal additional items, if the entire list is not visible. To
deactivate the pop-up menu, press the camera views button again, select a
view from the menu or press any other button.

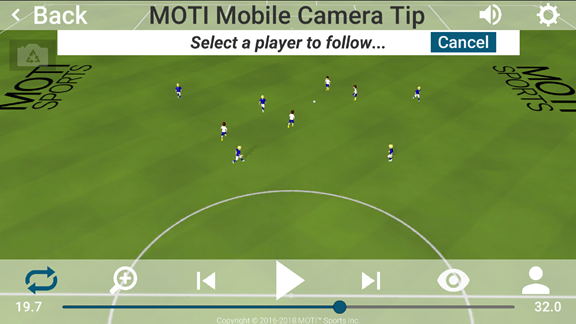
Contained in this menu are several default views of the field that will
appear with every drill. The names and descriptions of the default views
can be seen in the displayed menu view, directly above. Additionally,
depending on the drill, there may be camera drill-specific views that show
the drill, as the coach would like it viewed. These help the coach and
player focus on key elements of the drill.
As a note, selecting one of the views will also reset the camera zoom to a
level specific to the view.
In Conclusion
In conclusion, the Zoom Control and Camera Views Menu
help the user view the drill from a multitude of angles and levels of
detail. Additionally, look for drill-specific views to gain additional
insight into the drill, as the coach would like the user to see it.
View Part Three of Drill Controls here.

I have been working on MOTI Sports software since 2010. I work on enhancements to the 3DST 3D Coaching Play Simulation tool (3D Playbook) and I am the author of the MOTI Soccer App. Prior to joining MOTI, I worked on a variety of animation and visual programming including 3D flight simulator for Hughes Aircraft.